


Nothing brings more joy than a bouquet of freshly-cut blooms (especially if they’re flowers you’ve grown yourself from seed!). Whether it’s for a wedding, an anniversary, a birthday, or just because, a floral bouquet is one of life’s true pleasures.
But at some point, all good things must come to an end. No matter how beautiful the arrangement, there comes a time where you have to get rid of your wilted blooms.
Usually, flowers that are past their best get thrown straight in the trash. But did you know that there’s a ton of cool and creative ways to make use of your old bouquet, preserving its magic for years to come?
If you’re interested in reducing waste and extending the life of your decorative flowers or wedding bouquet, keep reading!

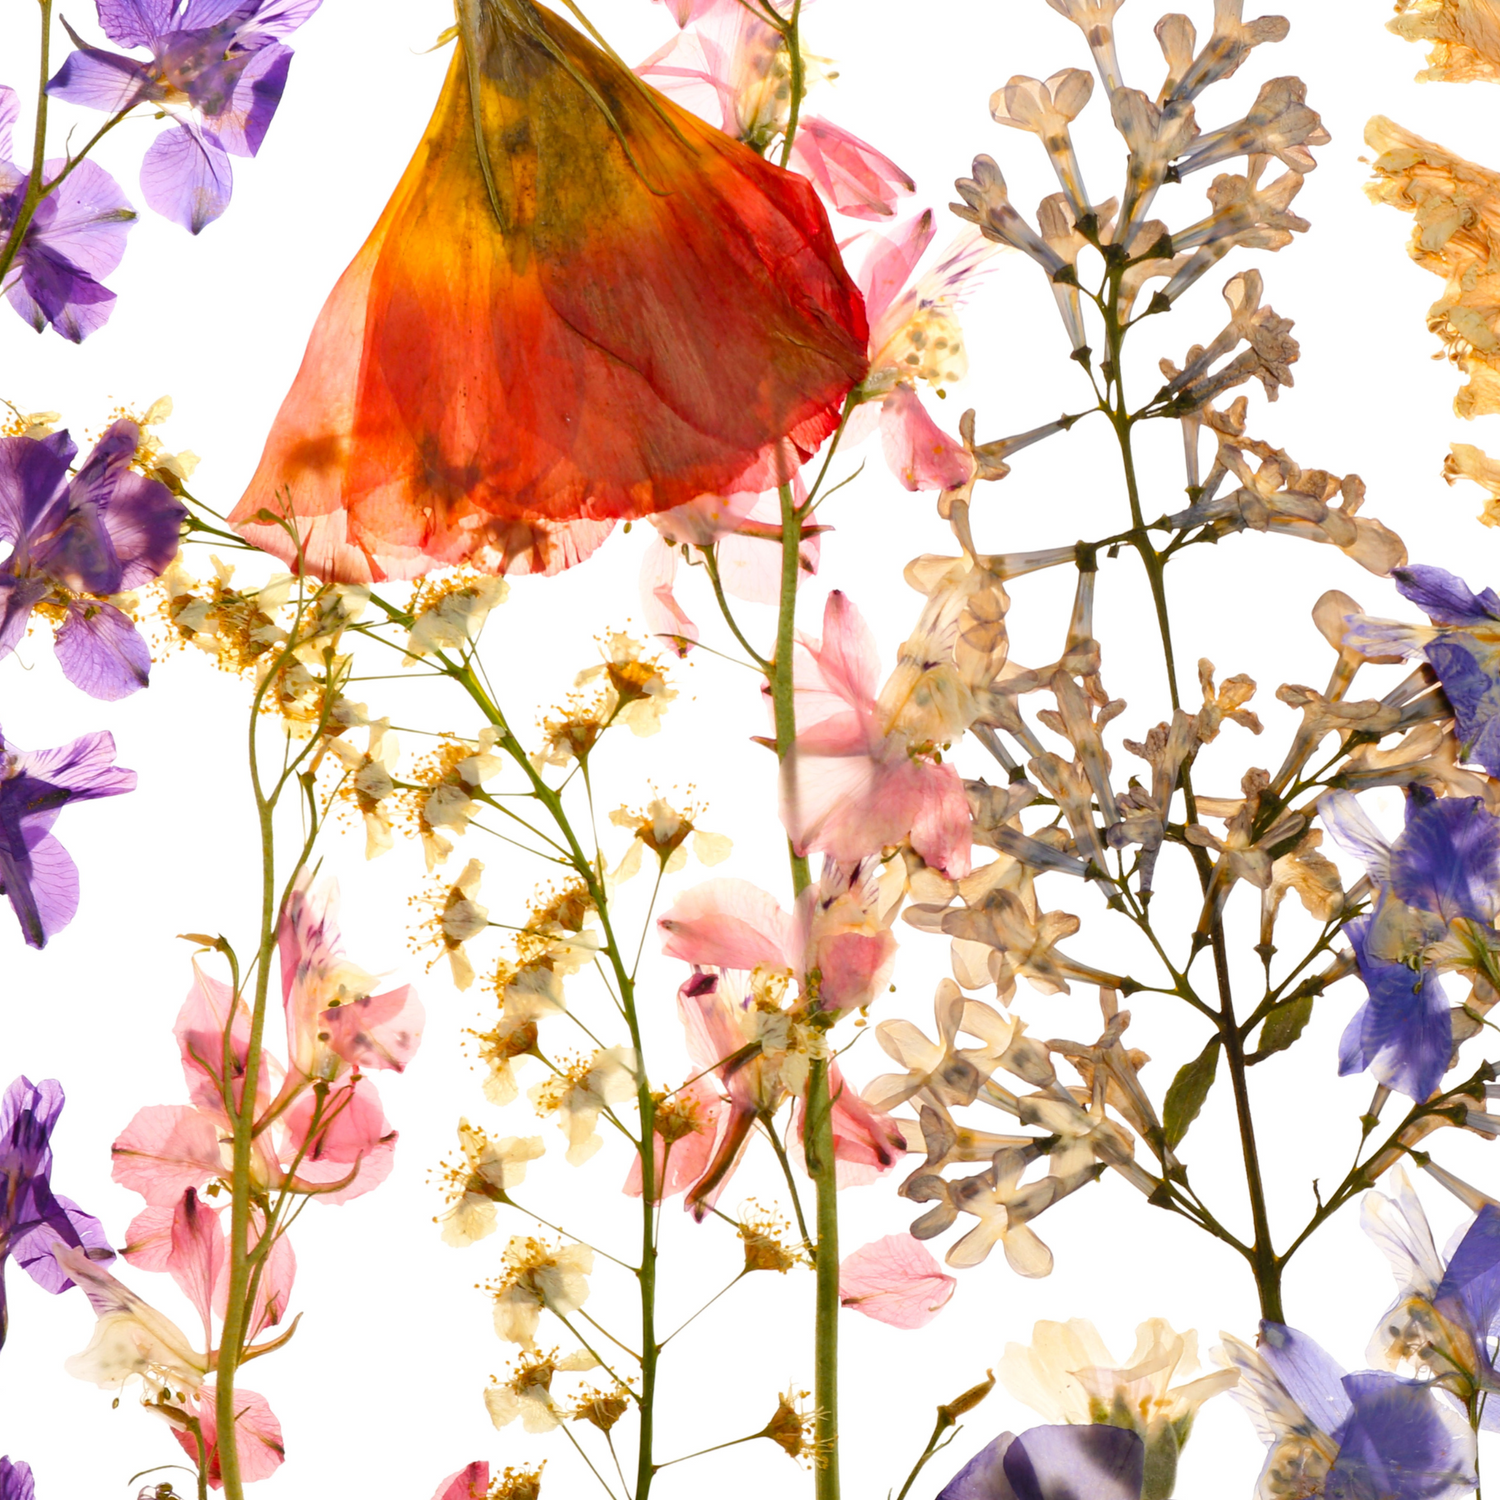
How to Press and Frame Your Bouquet
A beautiful way to preserve your bouquet is to press the flowers and frame them like a work of art. There are many professionals who will be able to do this for you – but if you’re feeling crafty, it’s straightforward and satisfying to do it yourself! Here’s how:
Step 1: Make sure your flowers are fresh
The fresher your flowers are, the better they’ll preserve – so don’t wait until they start to wilt or go brown.
If you’re preserving your wedding bouquet and you’re not sure you’ll have the time (or the energy!) to press your flowers in the week after your wedding, make sure you have a backup plan. This could be a generous friend who’s up for doing it on your behalf, or a professional artist who can take it off your hands.
Step 2: Select the flowers you want to preserve
Now it’s time to choose the flowers that will make up your preserved artwork.
You’ll get the best results from blooms that are already quite flat – think daisies, cornflowers, or small-petalled plants like lily-of-the-valley. Herbs such as lavender and rosemary are also a good option.
If your bouquet is made up of larger flowers such as peonies or roses, you have a couple of options. You can remove and press individual petals, or cut the flower head in half. (You could also hang your bouquet to dry to create a different finished look – see below!)
Step 3: Trim your stems and press your flowers
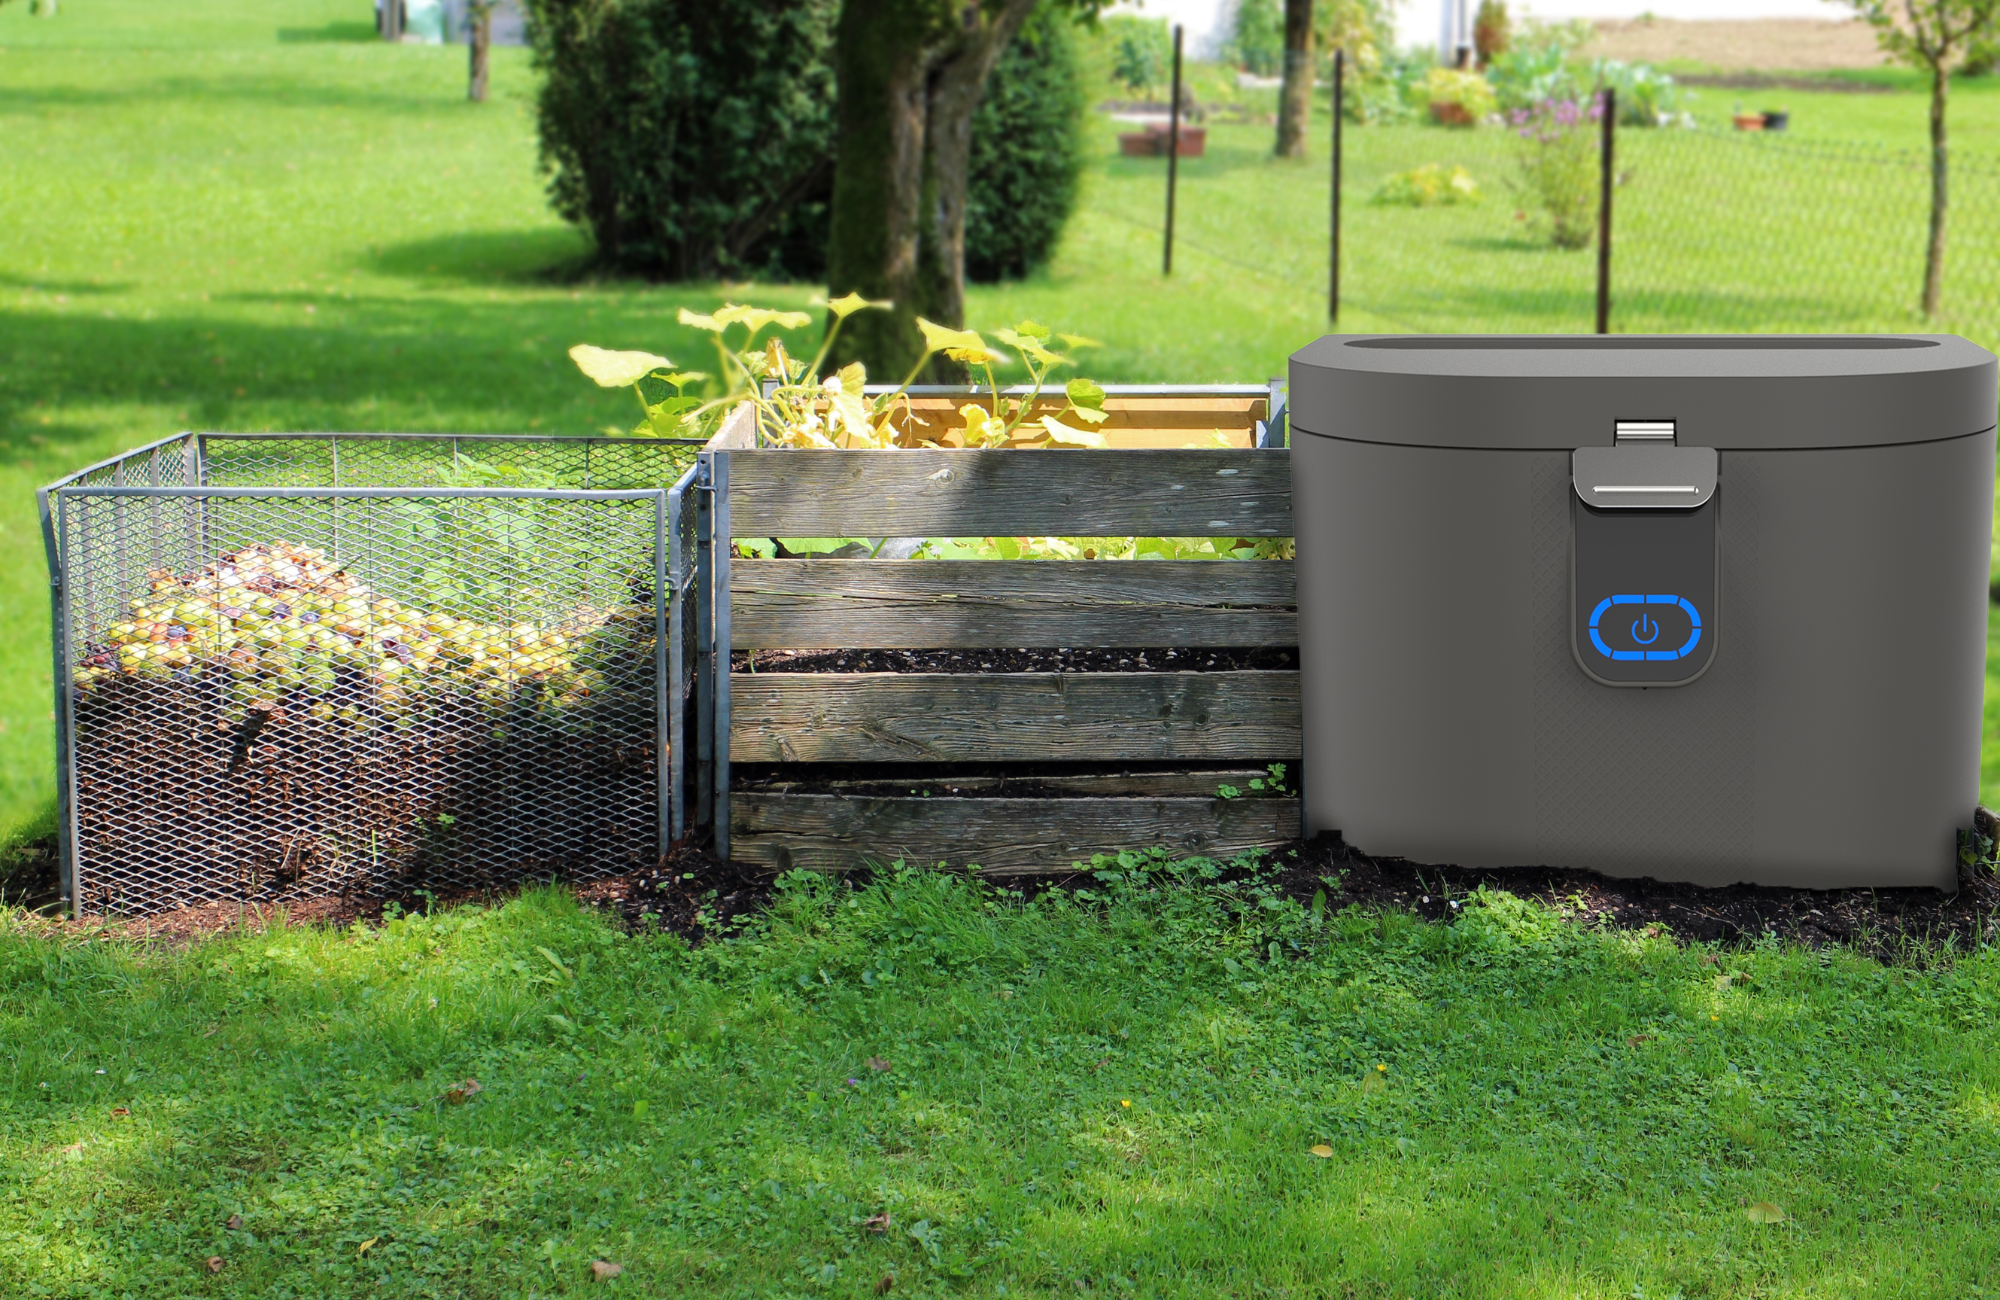
Cut your stems down to around an inch or less. (If you have a FoodCycler, you can chop up your leftover stems and add them to the bucket, the resulting by-product can be used as fertilizer when added to soil.)
Then, when you have your flowers ready, it’s time to press. You can use a heavy book, or buy a ready-made kit with a press included. If you are using a book, make sure it’s one you’re not too precious about, as color and/or moisture might transfer from the petals.
Place a piece of absorbent paper – like blotting paper or even a coffee filter – onto your surface. Add one or two flowers, making sure there’s plenty of space between them. Then place another piece of paper on top, and slowly close your book or clamp.
Continue until all your flowers are in place, then leave them to set for 2-3 weeks.
Step 4: Arrange!
You’ll know your flowers are ready when they’re dry and delicate to the touch. You want to make sure they’re completely free of moisture before putting them in your frame.
Carefully pick up each flower (we recommend a pair of tweezers for this) and gently set it down on a piece of paper. Do a trial run of your arrangement before you get the glue out, and take a picture of it so you can recreate it exactly how you want.
When you’re set on your arrangement, it’s time to glue. Using a small amount of craft glue, take a small brush or toothpick and spread the glue on the back of your flower. Gently press it onto your paper or card and hold for a few seconds. When you’re completely done, let the whole thing dry for at least a couple of hours.
And that’s it – you’re ready to frame!

How to Air-Dry Your Flowers
If you’re looking for a more three-dimensional way to preserve your bouquet – for example, to display in a vase – then it’s easy to air-dry your flowers too.
Simply tie your stems tightly together, leaving enough twine at each end to hang your bouquet from. Then, attach your twine to the bottom of a wire coat hanger.
Hang your bouquet somewhere warm (and where it won’t get in your way!) for around 2-3 weeks. Again, you’ll know when it’s dry when the petals are brittle and almost crispy.
Display your dried bouquet as it is, or enclose it in a glass display case to preserve it for even longer.

How to Preserve Your Bouquet With Silica Gel
The closest you can get to freezing your bouquet in time is to preserve it in silica gel. This will keep the bouquet close to its original three-dimensionality and close to its original color, too.
All you need to do is sprinkle a layer of silica gel (which you can pick up at a craft store) into an airtight container and gently place your flowers. Then, carefully pour more gel over the top until your flowers are covered and your container is full.
Close the lid of your container and leave it somewhere safe for seven days. At the end of the week, you’ll have a beautifully set bouquet ready to display!

Reducing Waste on Special Occasions and Beyond
Fresh-cut flowers are beautiful, but it can be hard to justify the waste they produce. That’s why it’s so satisfying to be able to give your bouquet a new lease of life.
And for any excess organic waste that you have left over, you can keep the cycle of life going by transforming it into nutritious fertilizer, aka ‘foodilizer’, for your plants! Simply chop it up and add it to your FoodCycler, ready to be turned into a powerful soil amendment for your garden and your indoor plants.
A Note on Terminology
The FoodCycler® is a countertop electric food waste recycler that breaks down food scraps through a mechanical process into a dry, lightweight by-product that can be used in gardening applications as a fertilizer. The FoodCycler® and other electric food waste recyclers are not composters, nor do they produce compost or soil as they do not require additional microbes to break down food waste with bacteria. However, the term "electric composter" has been used to describe electric food waste recyclers.


